

To the extent that making materials go, paper is one that requires no expertise with which to work. Paper craft are enjoyable to make, however they're inconceivably simple paper specialties to make. They're so natural to make that even little children can add to the paper create fun. Anybody can plunge into expressions and specialties - no genuine expertise or broad preparation is required. Essentially track down your motivation and rejuvenate it.
Underneath, you'll find a rundown of tomfoolery paper creates the entire family can make. We have a lot of simple paper creates for youngsters. Examine this rundown to track down your new most loved thought.
What You Need to Start: Tools for Paper Crafts?
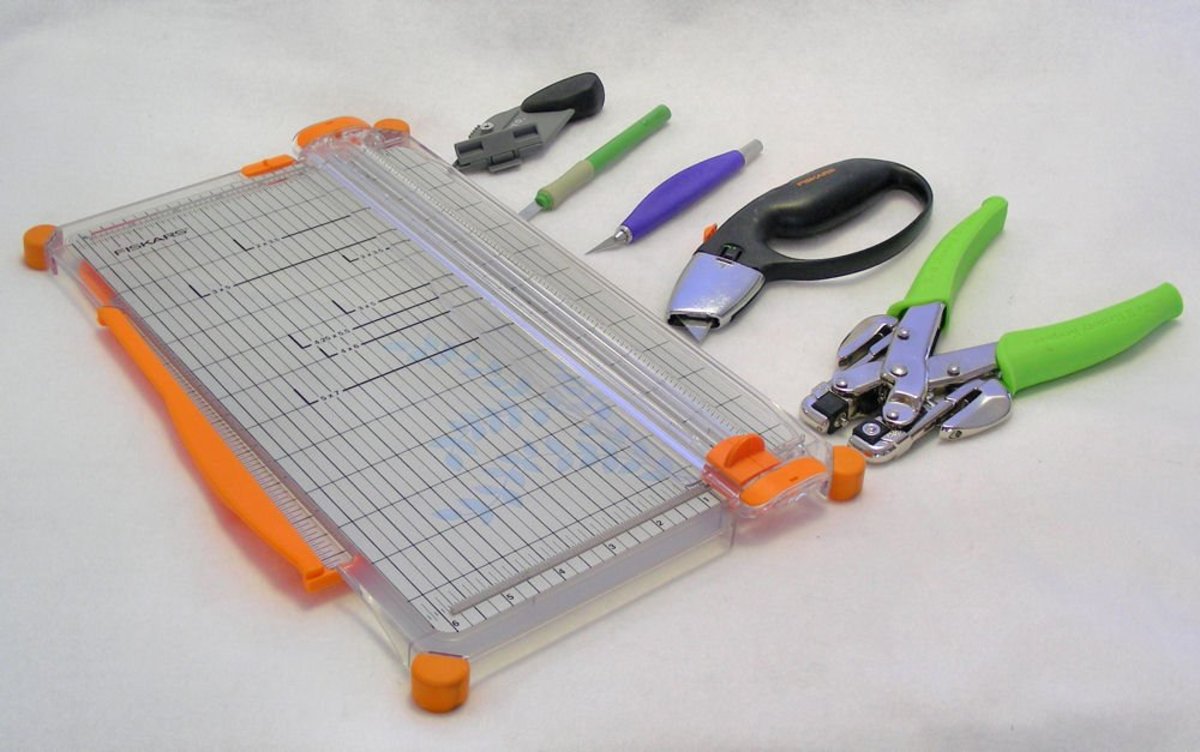
While there are endless devices available for different capabilities, just a small bunch of the works of art stay in steady use. These simple paper creates require the accompanying devices: scissors, stick, and a specialty blade.
To the extent that creating goes, you can't turn out badly with the Slice® Ceramic Scissors (Little). This execute is ideally suited for your youngsters. The edges are protected to the touch while they slice through nearly anything flawlessly and successfully. Your child's wellbeing is a main concern.
Types of Craft Papers to Use
Sorts of art paper incorporate tissue paper, cardstock, development paper, origami, newsprint, and crepe paper. Our instruments are intended to slice through for all intents and purposes anything while at the same time guarding you. Consider putting resources into Cut instruments for your next enormous craftsmanship project.
Simple Easy Paper Crafts for Kids of All Ages
1. Paper Handprint Peacock
For this basic and tomfoolery configuration, you'll require the accompanying materials:
Stick
Pencil
Scissors
Cardstock paper
Make stick
Squirm eyes
Subsequent to acquiring these materials,
Stage 1: You'll begin by following a diagram of your hands on the cardstock paper.
Stage 2: Then, cut out the hand shaped impressions (having different-sized hands for this project is ideal). These prints will address your peacock's energetic plumes.
Stage 3: Next, you'll remove the peacock's parts, including its bill, feet, peak, and body. You'll have to stick the hand shaped impression patterns together by layering them, with the littlest hand on the top and the biggest on the base.
Stage 4: Then, you'll stick the eyes, feet, mouth, and peak to your peacock's body. Keep that paste stick helpful as you stick the peacock to the imprint plumes and add the specialty adhere to its rear.
Presently, your children will have a bright paper companion with which to play.
2. Paper Caterpillar Finger Puppet
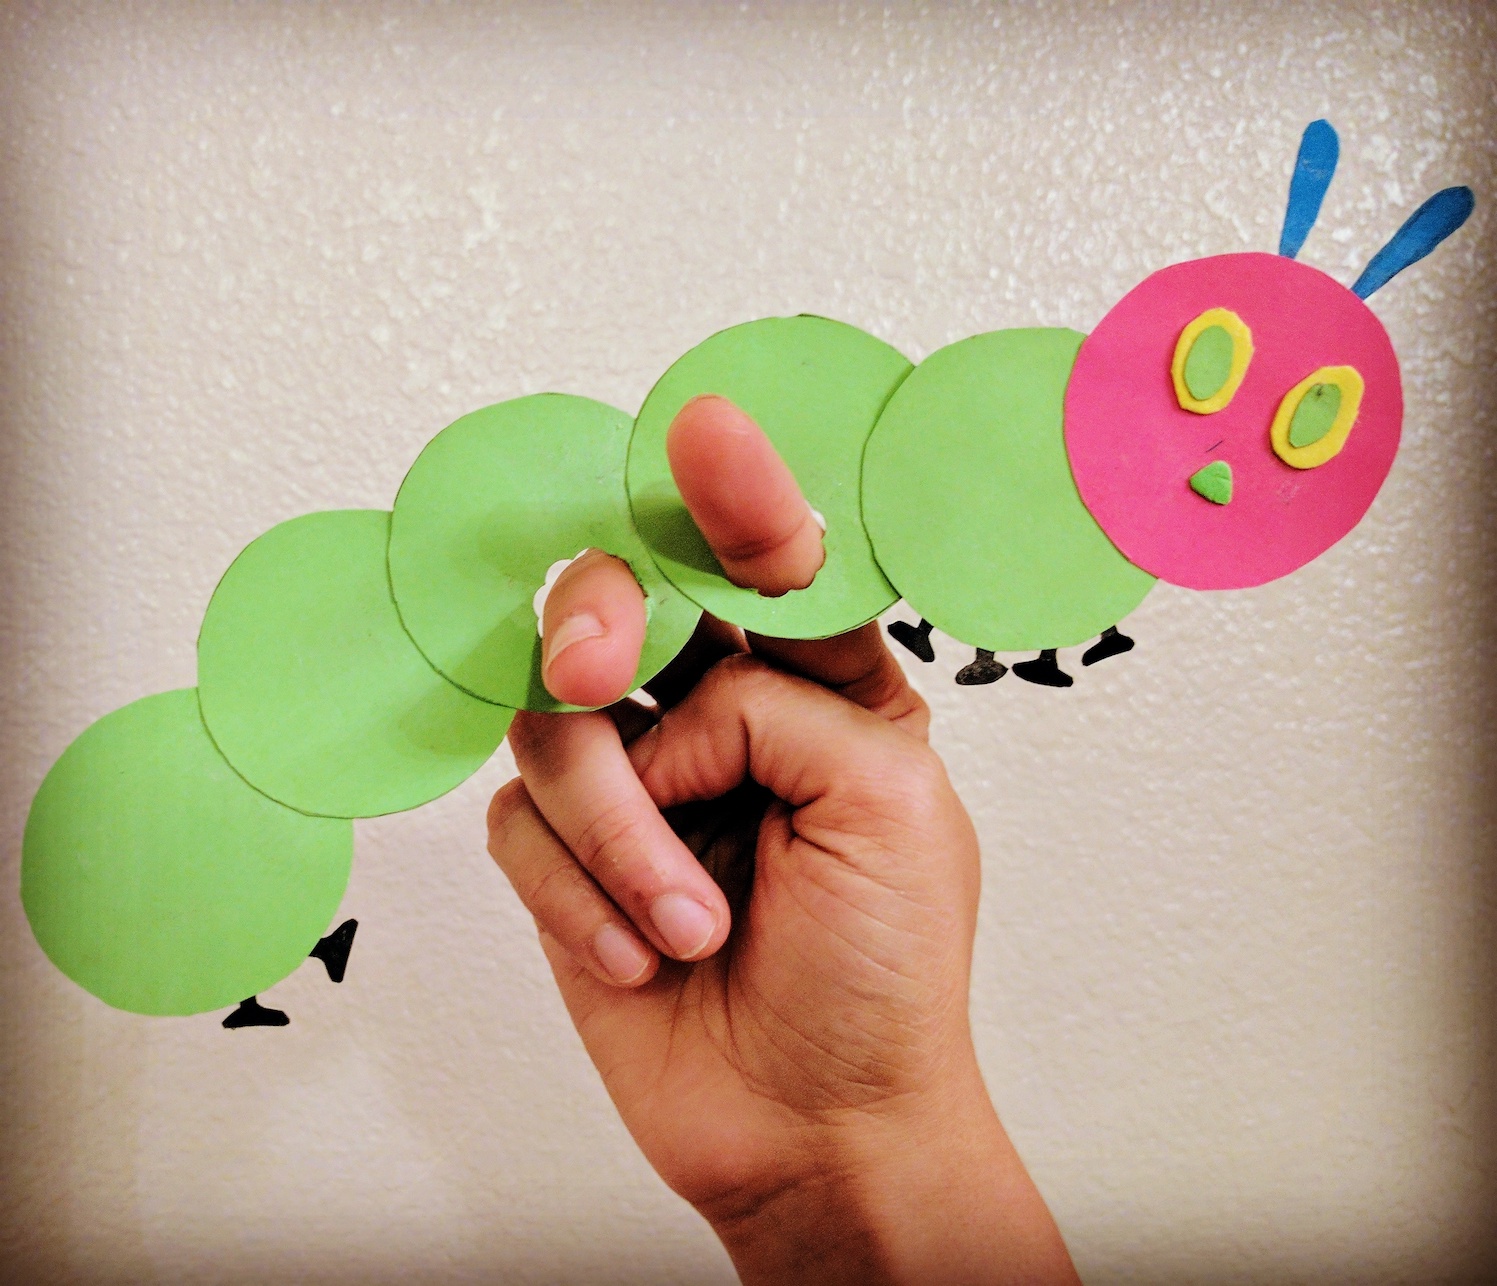
This task will keep your little ones busy with some caterpillar recess.
For this specialty, you'll require:
A paste stick
Scissors
Cardstock paper (green, pink, dark, blue, and yellow)
A pencil
Stage 1: First and foremost, cut five circles from the green paper and one from the pink paper.
Stage 2: Then, you'll draw and cut shapes for the eyes, ears, mouth, and legs. Follow that up by sticking the green circles together to make the caterpillar's body and make the pink circle the head.
Stage 3: Next, stick the elements to the caterpillar's head. Finally, you'll append the legs to the body. Let the caterpillar manikin show start!
3. Newspaper Flower
Blossoms can tidy up any setting, regardless of whether they're genuine. On the off chance that you and your little one appreciate making fun blossom shows, why not use paper as a material? It's an incredible method for reusing materials and get imaginative with your specialties and specialties projects. For this specialty, you'll require the accompanying:
Cardstock paper
Paper
Stick
Paper straw
Stapler
Scissors
Improving paper edge scissors
Stage 1: You'll begin by cutting six strips from the paper (around 6 inches each) and managing the closures to make them roundabout. Staple every one of the strips together, spreading out the strips in a circle to emulate the presence of blossom petals.
Stage 2: Then, at that point, cut a circle out of the cardstock paper utilizing beautiful paper edge scissors. Stick that circle in the paper petals and paste the straw on the posterior of your blossom.
4. Paper Butterfly
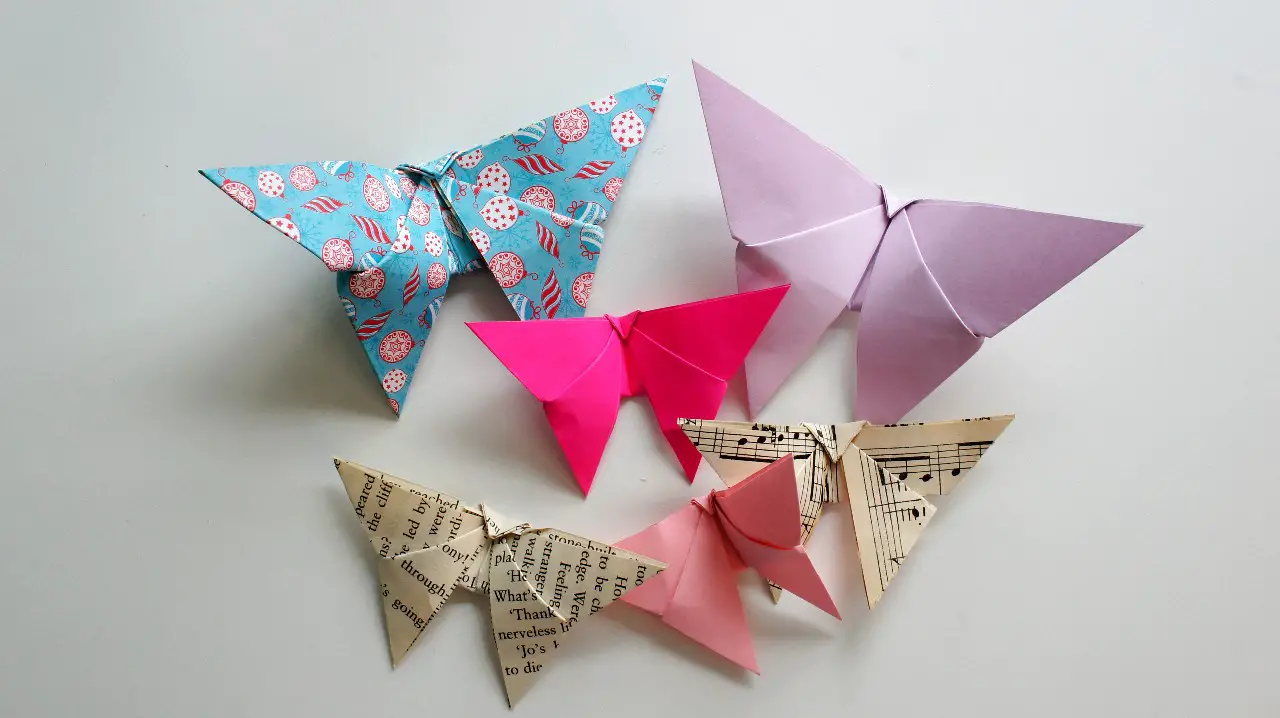
Who doesn't cherish a beautiful and simple paper butterfly make? These basic and tomfoolery paper butterflies are ideal for lighting up any space and bringing contemplations of hotter climate. This plan requires the accompanying:
Scissors
Stick
A format
Yarn
Hued make paper
Stage 1: You'll have to print out the format on this page prior to making a plunge. You'll get upper and lower wings.
Stage 2: Then, accordion overlap the wings. Apply a paste drop to the center of the lower wings.
Stage 3: Append the two arrangements of wings with the paste as the holding specialist. Tie a few yarn around the center segment and utilize the closures as radio wires. Spread the folds of the wings out to make them look full.
5. Shamrock Paper Wreath

The karma of the Irish is your ally. These shamrock paper wreaths are ideally suited for not simply St. Paddy's Day yet an all year family staple of best of luck. You'll require the accompanying:
A pencil,
Scissors,
Cardstock,
Stick,
Create paper with various shades of green,
What's more, a format (which you can download here).
Stage 1: Layout and cut out the shamrock wreath design. Then, at that point, cut the green specialty paper into 1-inch squares. Fold that paper into little balls.
Stage 2: Paste the paper balls to the foundation of the wreath. Whenever you've wrapped up covering the shamrock wreath with fluctuated shades of green paper, you're prepared to show your creation.


