I remember my first time trying resin. I mixed too fast. Bubbles everywhere. The coaster came out with weird sticky spots because I did not measure right. I almost gave up. But then I tried again. And again. Now I make resin crafts all the time. You can too. Resin is not as hard as it looks. You just need to know a few basic things before you start. This guide will tell you exactly what those things are. No fancy terms. Just straight talk.
What Is This Resin Stuff Anyway?
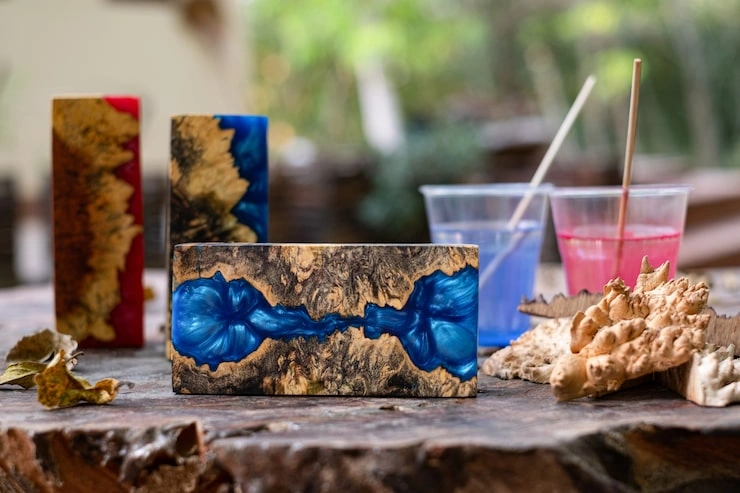
Resin is a liquid that turns hard. Think of it like liquid glass. You mix two parts together. One is the resin. The other is the hardener. When they mix, they get warm and slowly turn solid. The end result is shiny, clear, and homemade resin crafts for beginners.
People use resin to make coasters, jewelry, trays, and even art pieces. You can put things inside it too. Dried flowers, glitter, small shells. The resin holds them forever like a tiny time capsule. There are different kinds of resin out there. For someone just starting, epoxy resin is the best choice. It is easier to work with and does not smell as strong as other types.
Read Also: Homemade Candles With Soy Wax Beginners
What You Actually Need To Buy?
You do not need to spend a lot of money to start. Here is what you really need.
- First, get a resin kit. Look for one that says 1:1 ratio. This means you mix equal amounts of both parts. It takes the guesswork out of measuring.
- Second, buy silicone molds. These are soft and bendy. When your resin hardens, you just push the mold and your piece pops right out. Coaster molds are great for beginners. They are flat and simple.
- Third, get mixing cups and sticks. Clear cups with lines on them help you measure. Wooden sticks work fine for stirring.
- Fourth, gloves. This is not optional. Resin can bother your skin. Get the disposable kind. They are cheap.
- Fifth, something to cover your table. Resin drips. It is hard to clean once it dries. Use wax paper or a plastic tablecloth.
- Sixth, a heat gun or a small torch. This is for popping bubbles. You will get bubbles. Everyone does.
- Last, colors. You can get liquid dyes or powder pigments. Start with a few basic colors. You can always get more later.
The Right Way To Mix
This part is important. I cannot stress this enough. Measure carefully.
Get your cup. Pour the resin part up to the line. Then pour the hardener up to the exact same line. If you use a scale, weigh them equally. Do not guess. Guessing leads to sticky messes that never harden.
Now stir. Stir slowly. Scrape the bottom. Scrape the sides. Keep stirring until you see no more streaks. The liquid should look clear and uniform. This takes about three minutes.
Do not stir fast. Fast stirring puts more air into the mix. More air means more bubbles. More bubbles means more work popping them later.
Adding Color And Fun Stuff
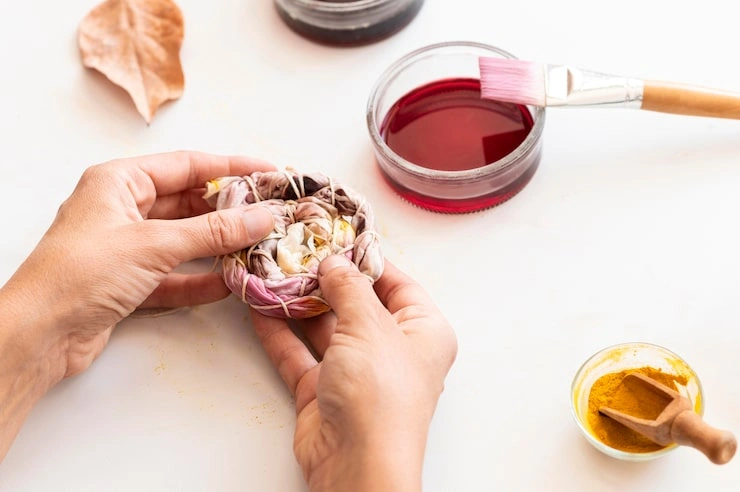
Once your resin is mixed well, you can add color. Put in a tiny drop of dye. Stir it. See if you like the shade. You can always add more. You cannot take it out.
If you want to put things inside your resin, put them in the mold first. Then pour the resin over them. Make sure everything is dry. Wet things cause problems. The resin will not harden right around moisture.
Glitter is fun. Flowers are pretty. Small beads work too. Do not go overboard. Too many things can make your project look crowded.
Pouring Without Making A Mess
Pour slowly. Tilt your cup and let the resin flow out gently. Pour from one spot. Let it spread out on its own. This helps keep bubbles down. If you are making something with layers, wait. Pour one layer. Let it set up a bit. Then pour the next layer. This keeps your colors from mixing together into a muddy mess.
Make sure your mold is on a flat surface. If your table is crooked, your resin will be crooked. It will harden that way.
Getting Rid Of Those Annoying Bubbles
Bubbles are the worst. They show up right after you pour. Little dots all over your beautiful project. This is where the heat gun or torch comes in. Turn it on. Hold it a few inches away from the surface. Move it back and forth. The heat makes the bubbles come up and pop. You will see them disappear. Do not hold the heat too close. Do not hold it in one spot. You can burn the resin. Burned resin looks bad and smells worse. Sometimes bubbles come up later. Check back after a few minutes. Pop any new ones you see.
The Waiting Game
This is the hardest part for me. You have to wait. Resin takes time to harden. Most resins need 24 hours to get firm. Some take up to 72 hours to fully cure. Do not touch it. Do not move it. Leave it alone in a clean place. Cover it with a box or a container. Dust can fall on it while it cures. Dust ruins the shiny finish. After a day, you can touch it. If it feels hard and not sticky, it is ready. If it is still soft, wait longer.
Taking It Out Of The Mold
When your piece is fully cured, take it out. Bend the mold back. Push from the bottom. Your piece should come out easy. If it sticks, it might not be fully cured. Give it more time. Once it is out, look at the edges. Sometimes there are sharp bits. You can sand them smooth with fine sandpaper.
Easy Projects To Start With
- Coasters are the best first project. They are flat and useful. Make a set of four. Give them as gifts.
- Keychains are next. They are small. You can make many with one batch of resin. Add a keyring and you are done.
- Small trays are good too. You can put jewelry or keys in them. They look nice on a dresser.
- Pendants are fun. You can wear them. Or give them to friends. Everyone likes handmade gifts.
What Can Go Wrong?
Things will go wrong. That is okay. Here is what happens and how to fix it.
- Sticky resin means you did not measure right. Or you did not mix enough. There is no fix for this. You have to start over.
- Cloudy resin means moisture got in. Or you poured too thick. Keep things dry. Pour in thin layers.
- Bubbles that stay mean you did not use heat. Or you used a torch wrong. Practice on small pieces first.
- Yellowing happens over time. It is normal. Some resins yellow less than others. Buy good quality resin.
You May Also Like: Easy Homemade Items You Can Make at Home
Tips From My Mistakes
Work in a room with open windows. The smell can be strong. Fresh air helps.
- Wear old clothes. Resin does not wash out.
- Have paper towels ready. Drips happen.
- Do not rush. Rushing causes mistakes.
- Clean your tools right away. Resin hardens and is impossible to remove once it does.
- Start small. A tiny project teaches you a lot.
Safety Is Not A Joke
Resin is safe when you handle it right. But you need to be careful.
- Wear gloves. Every time. No exceptions.
- Work in a place with good airflow. Open a window. Use a fan.
- Do not eat or drink near your workspace. Resin is not food.
- Keep resin away from kids and pets. They do not know better.
- If resin gets on your skin, wash it off with soap and water. Do not wait.
The Fun Part
The best thing about resin is how many things you can make. Every project is different. You can change colors. Change shapes. Change what you put inside.
- You will make mistakes. I still do. But each mistake teaches you something.
- When someone asks where you got that beautiful coaster, you can say you made it. That homemade resin crafts for beginners.
Wrapping It Up
Resin crafts are for everyone. You do not need to be an artist. You just need to follow the steps and be patient. Start with simple projects. Get your supplies together. Measure carefully. Mix slowly. Pop those bubbles. Wait for it to cure. Before you know it, you will be making things you are proud of. Go ahead. Give it a try. Your first piece might not be perfect. But your second one will be better. And your third one will be even better than that. That is how everyone starts. That is how you will get good at it.