You do not need a dedicated craft room or a degree in fine arts to make something with your hands. Most adults who want to start a creative hobby get stuck at the same point. They look at a project online, see a list of forty supplies, and close the tab.
This article is for the person who wants to sit down at the kitchen table for two hours and end up with something real. A bookmark. A small dish. A garland for the wall. These projects use materials you likely already own or can find for under twenty dollars. Each one takes between thirty minutes and two hours. None of them require special easy crafts to make at home for adults.
Why Simple Crafts Are Better Than Complicated Ones?
There is a strange belief that a hobby is only worthwhile if it is difficult. That is not true. A short project that you finish gives you a sense of completion. A long project that sits half-done in a closet gives you guilt.
Adults deal with enough unfinished tasks at work and at home. Your creative time should not add to that pile. Simple crafts let you learn a skill without committing to a months-long project. You can test if you enjoy working with clay or thread before you buy a hundred dollars of supplies.
Pressed Flower Bookmarks
This project is one of the most forgiving crafts you can try. There is no wrong way to arrange flowers on a strip of paper.
What You Need
-
Small flat flowers or leaves (violas, daisies, ferns, or pansies work well)
-
Heavy books or a flower press
-
Plain paper or parchment paper
-
Cardstock or watercolor paper
-
Clear contact paper or laminating pouches
-
Scissors
-
Ribbon or twine (optional)
-
Hole punch (optional)
-
Glue stick or double-sided tape
How To Make It
Start by gathering flowers. A short walk around your neighborhood or yard will give you what you need. Pick flowers that are naturally flat. Thick blooms like roses do not press well because the center stays moist and can rot.
Place your flowers between two sheets of plain paper. Put the paper inside a heavy book. Stack more books on top. Let them sit for one to two weeks. If you have a flower press, use it. It works faster and keeps petals from wrinkling .
Once your flowers are dry, cut strips of cardstock about two inches wide and six inches tall. Arrange the pressed flowers on the card. Move them around until you like the layout. Glue them down with a small amount of glue. Too much glue will soak through the petals and leave dark spots .
Seal the design with clear contact paper. Cut a piece slightly larger than your bookmark. Press it onto the front, flip the bookmark, and press another piece onto the back. Trim the edges. Punch a hole at the top and tie a ribbon through it if you want.
Read Also: Patriotic Fourth Of July Mason Jar Crafts
Air-Dry Clay Trinket Dishes
Clay has a reputation for being messy and difficult. Air-dry clay is different. It does not need a kiln. It does not need special tools. It behaves like a firm cookie dough.
What You Need
-
Air-dry clay
-
A rolling pin or a smooth bottle
-
A small bowl for shaping
-
Acrylic paint (optional)
-
A damp cloth
How To Make It
Roll a piece of clay into a ball about the size of a golf ball. Flatten it with your rolling pin until it is about a quarter inch thick. Drape the clay over the outside of a small bowl. Press it gently so it takes the easy crafts to make at home for adults .
Let it dry for twenty-four hours. Air-dry clay shrinks slightly as it dries, so it will pop off the bowl on its own. If it sticks, run a butter knife around the edge.
Once dry, you can paint the dish with acrylic paint or leave it plain. Plain white clay has a clean, modern look. Painted dishes feel more personal. Use it to hold rings, paper clips, or hair ties.
Scrap Fabric Coasters
If you have old clothes you no longer wear, you have craft supplies. T-shirts, flannel shirts, and old jeans all work for this project.
What You Need
-
Fabric scraps or old clothing
-
Scissors
-
Needle and thread or fabric glue
-
An iron (optional)
How To Make It
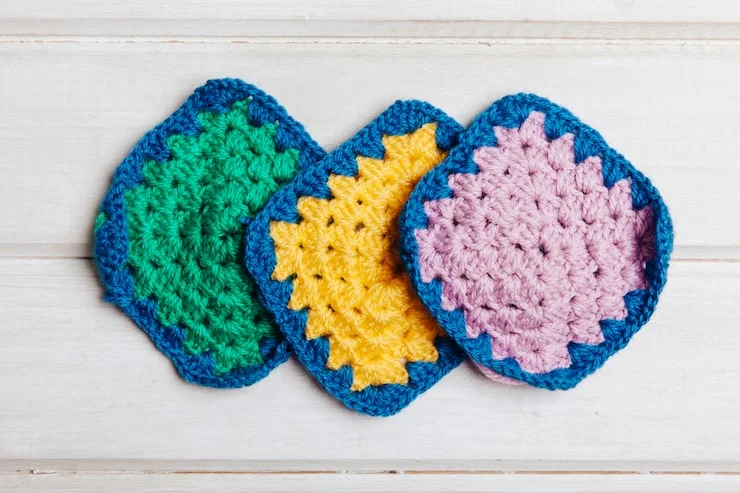
Cut your fabric into squares. Each square should be about five inches by five inches. Cut two squares for each coaster. If you want a thicker coaster, cut four squares and stack them.
Stack your squares. If you are using fabric glue, run a line of glue between each layer. Press down firmly. If you are sewing, use a simple running stitch around the edge. Hand stitching works fine. You do not need a machine .
To make the edges look neat, you can iron the finished coaster flat. A hot iron with steam will help the fabric layers bond and lie flat.
Painted Bookmarks with Watercolor
This is the fastest project on this list. From start to finish, you can have a set of bookmarks in thirty minutes.
What You Need
-
Watercolor paper or thick cardstock
-
Watercolor paint or acrylic paint
-
A brush
-
A cup of water
-
Scissors
-
A pen (optional)
How To Make It
Cut your paper into bookmark shapes. Standard size is about two inches by six inches. Paint whatever you want. Swirls, stripes, blobs of color. There is no wrong design .
Let the paint dry completely. If you want, write a short quote or a single word on the dry bookmark with a fine-tip pen. A word like “rest” or “begin” gives the bookmark a purpose.
These bookmarks make good gifts. Pair one with a paperback book you already own and you have a thoughtful present for almost no money.
Cardboard Flower Garland
Toilet paper rolls and tissue boxes usually go straight into the recycling bin. For this project, they become wall art.
What You Need
-
Empty toilet paper rolls
-
Pencil
-
Ruler
-
Scissors
-
Acrylic or craft paint
-
Paintbrush
-
Glue
-
String or twine
How To Make It
Flatten each toilet paper roll. Use your ruler and pencil to mark one-centimeter wide strips along the flattened tube. Cut the strips. Each strip becomes a petal .
Paint the petals inside and out. Soft pastel colors look nice, but you can use any colors you like. Let them dry completely.
Take five petals and arrange them into a flower shape. Glue the petals side by side. Let the glue dry. Repeat until you have as many flowers as you want.
Cut a piece of string long enough to hang across a wall or doorway. Glue the flowers onto the string, spacing them a few inches apart. Let everything dry overnight before hanging.
Mini Vision Boards
A vision board does not need to be a giant poster with fifty images. A small one works just as well and takes a fraction of the time.
What You Need
-
A notebook or a piece of cardstock
-
Old magazines or printed images
-
Glue stick
-
Scissors
-
A pen
How To Make It
Flip through a magazine and tear out images or words that catch your eye. Do not overthink it. If an image makes you pause, cut it out .
Arrange the cutouts on your page. Glue them down. Write a few words underneath or beside the images. Words like “calm,” “outside,” or “slow morning” give the board a focus.
Put the finished board somewhere you will see it. A desk drawer. The inside cover of a journal. The back of a door. It does not need to be framed or displayed for guests. It is for you.
Macramé Tealight Holder
Macramé looks complicated. The basic knots are not. A tealight holder uses two or three simple knots and takes about ninety minutes.
What You Need
-
2mm 3-ply string (about 26 meters for one holder)
-
A jar or vase (about 3 inches in diameter)
-
Scissors
-
Masking tape
-
A battery-powered tealight
How To Make It
Cut one piece of string about 22 inches long. Tape it to a flat surface. This is your base string .
Cut thirty-six pieces of string, each about 27 inches long. Fold each piece in half and attach it to the base string using a lark’s head knot. This creates a loop that wraps around the base .
Tie rows of square knots. A square knot is the basic macramé knot: take the left string over the middle strings, then the right string over the left, under the middle, and through the loop. Pull tight. It sounds harder than it is. After two or three tries, your hands will remember the motion .
Continue tying rows until the cover is as tall as your jar. Tie the macramé onto the jar and trim the ends. Use a battery-powered tealight inside. Real candles get hot and could scorch the string.
You May Also Like: Diy Pinecone Crafts: Here are 12+ ideas for decorating with pine cones
How To Pick Your First Project?
Do not start with the most difficult project on the list. Pick the one that uses materials you already have. If you have old t-shirts, make coasters. If you have flowers in the yard, press them. If you have empty toilet paper rolls, make the garland.
The goal is to finish something. A finished simple project teaches you more than an unfinished ambitious one. You learn how materials behave. You learn what part of the process you enjoy. You learn that you can make something with your own hands.
Once you finish one project, the next one gets easier. You stop worrying about doing it wrong. You start looking at everyday objects and thinking about what they could become.
Frequently Asked Questions
How long should a craft project take?
Anywhere from thirty minutes to two hours is a good range for a beginner. This is long enough to feel satisfying but short enough that you can finish in one sitting. If a project requires multiple days of waiting, like pressing flowers, the active work is still under an hour .
What if I am not creative?
Creativity is a muscle. It gets stronger with use. Start with a project that has clear steps and a defined outcome. Pressed flower bookmarks and clay dishes are good choices because the materials guide the result. You do not need to invent anything. You just need to follow the steps .
Do these crafts make good gifts?
Yes. Bookmarks, coasters, trinket dishes, and tealight holders all make good gifts because they are useful. A handmade gift feels more personal than something bought from a store. Wrap it in tissue paper and tie it with string. That is enough .
Where can I find materials without spending much?
Thrift stores, dollar stores, and your own recycling bin are the best sources. Old clothes become fabric. Toilet paper rolls become garland. Jars become candle holders. Buy only what you cannot find for free. Air-dry clay and string are the two supplies worth purchasing because they are hard to substitute .
The Real Point of Crafting at Home
You do not craft to produce a perfect object. You craft to spend an hour doing something that is not a screen. You craft to use your hands. You craft to make a small mark on the world that says you were here and you made this.